User Guide: Proxify+ Addon
Interface Overview

The Proxify+ addon UI is located in the 3D Viewport sidebar (N-panel), under the Proxify+ tab.
Interactive Documentation
How to Use This Documentation:
- Hover over any section to see detailed explanations
- Each tooltip explains the purpose and usage of that specific UI element
- Switch between Overview and Detailed Controls modes using the buttons below
Explore main panels and sections
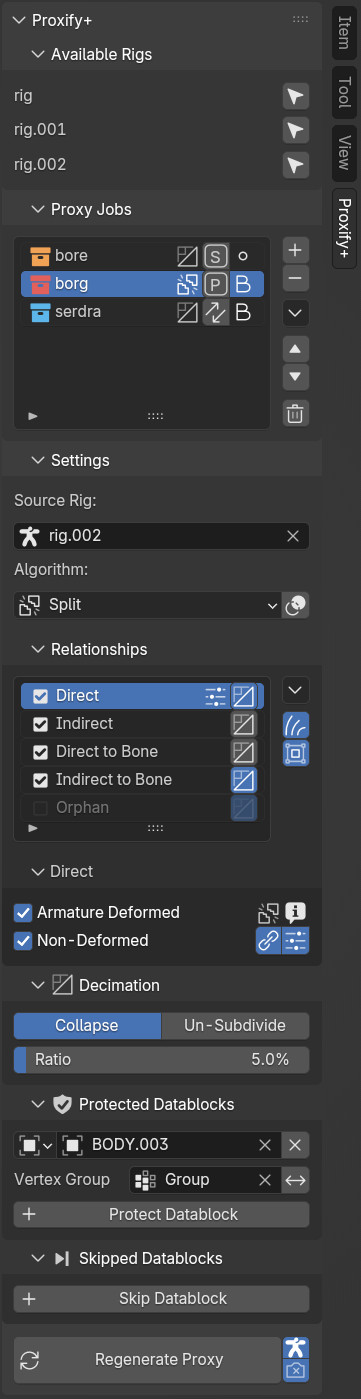
Available Rigs Panel
Panel listing all available armature rigs in the current scene.
Allows users to select a rig in the 3D view.
Proxy Jobs Panel
Panel for managing the list of proxy jobs.
Lets users add, remove, reorder, and access batch/special actions for jobs.
Settings Panel
Panel for configuring settings of the active proxy job.
Includes source rig selection, algorithm choice, and related options.
Generate Section
Section containing the main Generate Proxy button, shows progress and toggle actions for after generation.
Proxify+ Side Panel Tab
The add-on is displayed in the Side Panel ("N-Panel") of the 3D viewport and is operated trough it.
Proxy Job Specials Menu
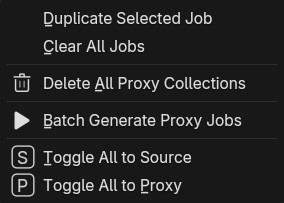
Specials menu for proxy jobs, providing batch and utility actions.
Includes options to duplicate jobs, clear all jobs, batch delete collections, batch generate proxies, and toggle all jobs between Proxy/Source modes.
Algorithm Selector

Defines Which algorithm the job should be processed.
Split: Split into pieces parented directly to bones.
Decimate: Reduces mesh complexity.
Toggle Overlays Menu (Split Algorithm Only)

Popover panel for configuring overlay and viewport settings for the Split algorithm.
Lets users toggle overlays and outlines after proxy generation.
Relationship Specials
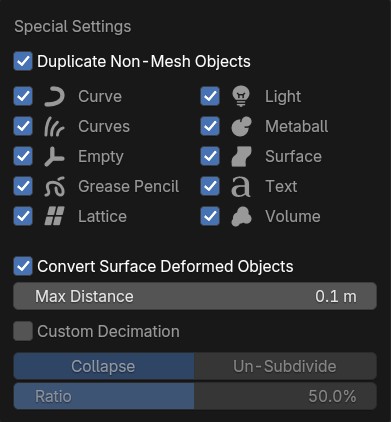
Popover panel for special settings related to non-mesh duplication and surface deformed object conversion.
Main Panels and Sections
Individual buttons and controls
Troubleshooting
Common Issues
❌ Addon not appearing?
- Verify installation in Preferences
- Check Blender's Console for errors (Window → Toggle System Console)
❌ Operators grayed out?
- Ensure you have valid objects selected
- Check the active workspace (some operators only work in Layout or Modeling)
- If a button is grayed out, ensure a valid job and rig are selected.
- For more help, see the Installation and Index pages.